
Introduction
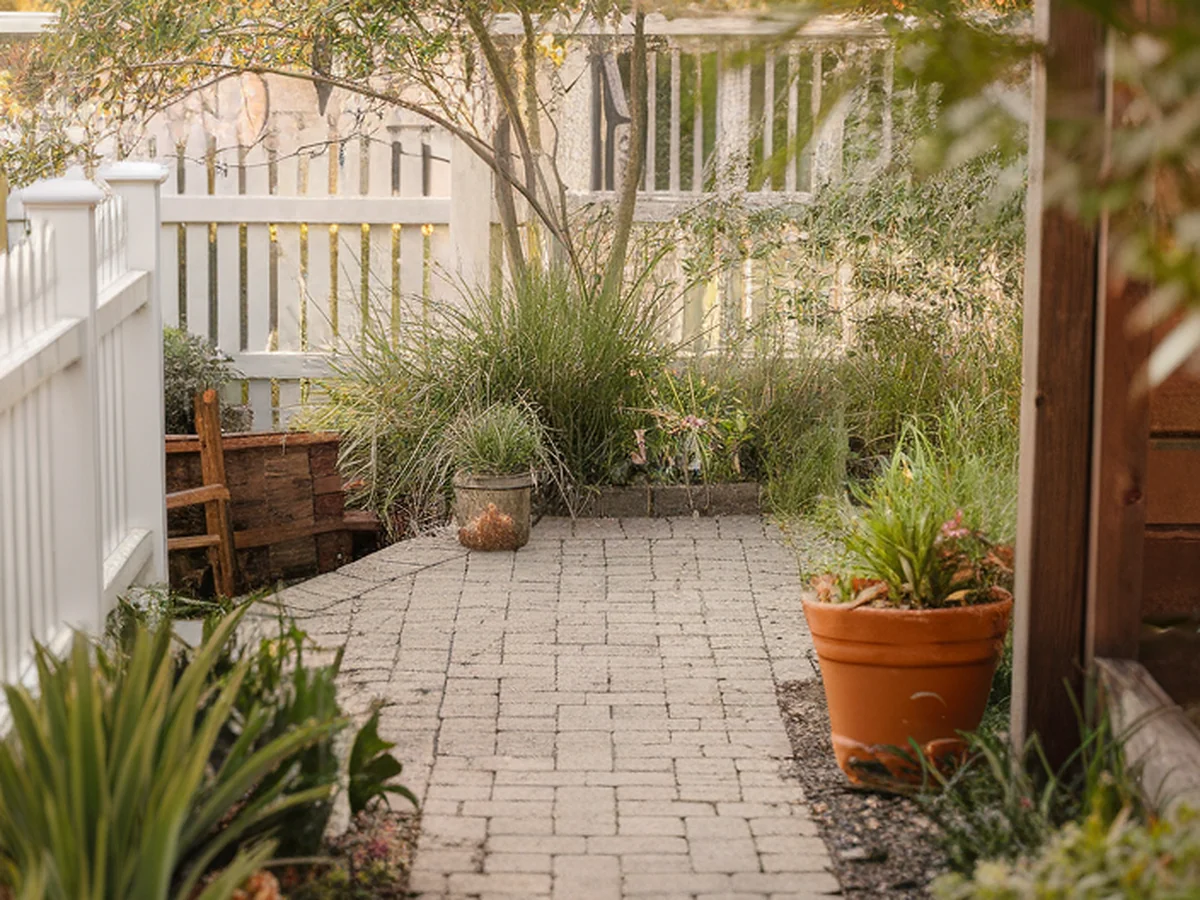
Imagine stepping into your backyard and being greeted by a charming, winding path that invites you to explore the beauty of your outdoor space. Picture lush greenery on either side, vibrant flowers blooming, and the soft sound of pebbles crunching underfoot. A well-designed walkway not only enhances the functionality of your yard but also significantly boosts its overall aesthetic appeal. It acts as a guiding thread through your landscape, creating a sense of order while allowing you to showcase the beauty of your plants and garden features.
In this era where home improvement doesn’t have to break the bank, budget-friendly DIY projects are more popular than ever. They empower homeowners to take control of their outdoor spaces and transform them into inviting retreats without spending a fortune. This article will guide you through the process of creating stunning walkways using cost-effective materials and innovative designs, ensuring that your outdoor space becomes a personal haven that reflects your style and creativity.
“Creating a cozy reading nook is all about maximizing comfort in a small space. It’s about intentional design that serves both function and feeling.”
– Interior Design Magazine
Choosing the Right Materials for Your Walkway
Selecting the right materials is essential when embarking on your walkway project, especially if you’re keen on staying within a budget. The materials you choose will not only affect the overall look of your walkway but will also determine its durability and maintenance needs. Fortunately, there are several budget-friendly options available.
Common materials for walkways include:
- Gravel: A versatile and cost-effective choice that allows for excellent drainage and can be easily replenished.
- Wood: Ideal for creating rustic pathways, but requires proper treatment to withstand the elements.
- Bricks: Offer a classic look and can be sourced second-hand or reclaimed.
- Pavers: Available in various styles and colors, providing a structured yet aesthetically pleasing option.
To source materials on a budget, consider checking local suppliers, salvage yards, or online marketplaces for reclaimed or second-hand materials. These avenues can lead to significant savings while also contributing to environmentally friendly practices. When selecting materials, it’s vital to balance cost with durability and aesthetic appeal. For instance, while gravel might be cheaper, you may need to spend more on landscaping to prevent weeds from growing through it.
Designing Your Walkway: Inspiration and Planning
The design of your walkway can greatly impact the overall feel of your outdoor space. You can opt for various styles, such as straight paths that lead directly to a focal point or curved paths that meander through your garden, creating a sense of discovery. The choice of design will depend on the layout of your yard and the mood you want to convey.
Landscaping plays a crucial role in the design process. Consider integrating plants along the edges of your walkway or using decorative borders made from stones or timber. This not only enhances the visual appeal but also helps to define the walkway’s boundaries. When sketching out your designs, be mindful of space constraints; a wide, sprawling path may not be suitable for a small yard.
For design inspiration, numerous online resources and tools can assist you. Websites like Pinterest offer a plethora of ideas, while landscape design software can help you visualize your project more clearly. Don’t hesitate to mix and match elements from different styles to create a walkway that resonates with your personal taste.
Step-by-Step Guide to Building a Gravel Walkway
Building a gravel walkway is one of the most straightforward DIY projects you can tackle, providing a rustic charm that complements any outdoor space. Below is a detailed step-by-step guide to help you through the process.
Necessary Tools and Materials:
- Shovel
- Rake
- Landscape fabric
- Gravel (preferably crushed stone)
- Tamper or roller
Installation Steps:
- Measure: Start by measuring the area where you want your walkway. Mark the borders with stakes and string to create a clear outline.
- Excavate: Dig out the area to a depth of about 4-6 inches, ensuring the base is level. This will prevent the gravel from shifting over time.
- Lay Landscape Fabric: Place a layer of landscape fabric over the excavated area to prevent weeds from growing through the gravel.
- Lay Gravel: Pour in your gravel, spreading it evenly with a rake. Aim for a thickness of about 3-4 inches.
- Tamp down: Use a tamper or roller to compact the gravel, creating a stable surface.
Maintenance Tips:
Maintaining your gravel walkway is relatively simple. Regularly check for weeds and pull them out by hand or with a hoe. You may also need to replenish the gravel every few years to maintain its appearance and functionality. Additionally, good drainage is essential; ensure that water can flow freely around your walkway to prevent erosion and maintain its integrity.
Creating a Rustic Wooden Pathway
A wooden pathway can add a warm, natural aesthetic to your outdoor space. When selecting wood for outdoor use, opt for types that are naturally resistant to decay, such as cedar, redwood, or treated lumber. Below is a guide to building a wooden plank walkway.
Tutorial Steps:
- Gather Materials: You’ll need wooden planks, screws, a saw, drill, level, and wood treatment products.
- Cut the Planks: Decide the width and length of your pathway, then cut the planks accordingly.
- Secure the Planks: Lay the planks side by side on the ground, ensuring they are level. Secure them in place using screws.
- Treat the Wood: Apply a wood treatment product to protect against moisture and insects, prolonging the lifespan of your walkway.
Enhancing Your Walkway:
Consider adding natural elements such as moss or stones around your wooden path for a more integrated look. This not only enhances the aesthetic appeal but also helps to blend the walkway into the surrounding landscape. Additionally, using wood chips or mulch along the sides can create a cohesive and inviting path.
Incorporating Pavers for a Stylish Walkway
Pavers are a fantastic choice for those looking for a stylish and durable walkway option. They come in various shapes, sizes, and colors, allowing for creative patterns and designs. Below is a step-by-step guide on how to prepare the ground and lay pavers for a stunning walkway.
Preparation Steps:
- Choose Your Pavers: Select the type of pavers that suit your style, whether it’s classic brick or modern concrete.
- Prepare the Ground: Similar to gravel, you will need to measure and excavate the area, ensuring it is level and compacted.
- Lay a Base: Add a layer of sand or gravel to create a stable base for the pavers.
- Lay the Pavers: Start laying the pavers from one end of your walkway, making sure they are snug against each other. Use a level to ensure evenness.
- Fill the Joints: Once all pavers are laid, fill the joints with sand or grout to secure them and prevent movement.
Decorative Touches:
To add a personal touch to your paver walkway, consider using decorative edging or lighting. Installing solar lights along the pathway not only enhances safety but also creates a beautiful ambiance at night. You can also plant low-growing flowers or shrubs along the edges to soften the look and integrate the walkway with your garden.
Using Recycled Materials for Unique Pathways
Embracing recycled materials is a fantastic way to create unique and environmentally friendly pathways. You can use reclaimed bricks, tiles, or even broken concrete to design a walkway that stands out. Here’s how to go about it.
Preparation and Arrangement:
- Gather Materials: Collect your preferred recycled materials from local salvage yards or home improvement stores.
- Prepare the Base: Similar to other walkways, clear and excavate the area to create a level base.
- Arrange the Materials: Lay out the bricks or tiles in a desired pattern. Consider mixing different materials for a more eclectic look.
- Secure the Pathway: Use sand or gravel to fill gaps and secure the materials in place.
Safety and Stability Tips:
When working with recycled materials, it’s essential to ensure they are stable and safe for use. Check for sharp edges or loose pieces and make sure they are securely placed. Additionally, consider using a sealant to protect your recycled materials from weather damage, prolonging their lifespan.
The environmental benefits of using recycled materials are significant, reducing waste and contributing to sustainable practices. Plus, each piece tells a story, adding character to your walkway.
Adding Finishing Touches to Your Walkway
Once your walkway is built, it’s time to focus on the finishing touches that will elevate its appeal. Borders can define your walkway and integrate it with the surrounding landscape, while lighting can enhance both safety and ambiance.
Border Options:
- Plants: Low-growing flowers or shrubs can create a vibrant border, softening the edges of your walkway.
- Stones: Decorative stones can act as a natural border, adding texture and contrast.
- Wood: Timber edging can provide a rustic and clean look.
Lighting Options:
Consider incorporating various lighting options to enhance your walkway:
- Solar Lights: Place these along the pathway for energy-efficient lighting that charges during the day.
- Lanterns: These can add a touch of charm and provide soft lighting in the evening.
Additionally, think about incorporating seating areas or decorative elements, such as sculptures or bird baths, to make your walkway a destination in itself. Seasonal decorations, like pumpkins in the fall or flowers in the spring, can keep your walkway inviting year-round.
Maintaining Your DIY Walkway
Routine maintenance is key to prolonging the life and beauty of your DIY walkway. Regular upkeep not only ensures safety but also enhances the visual appeal of your outdoor space. Here are some essential maintenance tasks you should consider:
Routine Maintenance Tasks:
- Cleaning: Regularly sweep or wash down your walkway to remove dirt, leaves, and debris. For pavers, a pressure washer can help maintain their appearance.
- Repairing: Check for any damaged areas or loose materials, especially after extreme weather. Prompt repairs will prevent further deterioration.
- Refreshing: Depending on the material, you may need to refresh the surface with new gravel or a wood treatment.
Seasonal Care:
Different materials require various seasonal care approaches. For instance, gravel might need replenishing after heavy rains, while wooden walkways should be treated with sealant before winter to protect against moisture.
Lastly, consider how you can refresh the aesthetic appeal over time. Small enhancements, like adding new plants or decorative features, can keep your walkway looking fresh and inviting.
Conclusion
Creating a well-designed walkway can significantly enhance your outdoor space, providing both functionality and beauty. By embracing budget-friendly DIY projects, you have the opportunity to personalize your environment and reflect your creative flair. Remember, stunning results can be achieved without overspending—it’s all about ingenuity, planning, and a little elbow grease.
As you embark on your walkway creation journey, I encourage you to explore your creativity and share your unique ideas in the comments below. Your outdoor space is a canvas waiting to be transformed, and with the right approach, you can elevate it beautifully.
| Element | Small Space Solution | Benefits |
|---|---|---|
| Furniture | Multi-functional pieces | Saves space |
| Storage | Vertical solutions | Maximizes wall space |
| Decor | Minimalist approach | Reduces visual clutter |
Frequently Asked Questions
What are the most affordable materials for a DIY walkway?
The most affordable materials for a DIY walkway include gravel, reclaimed bricks, and concrete pavers. Gravel is particularly cost-effective due to its easy installation and low maintenance needs. Reclaimed materials not only save money but also contribute to environmentally friendly practices. You can often find these at salvage yards or through online marketplaces.
How do I prevent weeds from growing in my gravel walkway?
To prevent weeds from growing in your gravel walkway, start with a layer of landscape fabric beneath the gravel to block sunlight and inhibit growth. Regular maintenance, such as hand-pulling weeds or applying a natural herbicide, can also help keep your walkway looking clean and tidy.
How can I maintain my wooden walkway?
Maintaining a wooden walkway involves regular cleaning, inspection, and treatment. Clean the surface with soap and water to remove debris, and inspect for signs of wear or damage. Treat the wood with a sealant or oil annually to protect against moisture and pests, ensuring its longevity.
What design styles work best for walkways?
Popular design styles for walkways include straight, curved, and patterned paths. Straight pathways are great for formal gardens, while curved paths can create a more natural, relaxed feel. Patterns, such as herringbone or circular designs, can add visual interest and creativity to your walkway.
Can I use recycled materials for a walkway?
Absolutely! Using recycled materials such as bricks, tiles, and broken concrete can create a unique and environmentally friendly walkway. Ensure that recycled materials are stable and safe for use, and consider mixing different types for an eclectic and creative look that stands out.